HubSpot CRM Integration Guide
To set up LiveAdmins on HubSpot, you can do it by following a few simple steps. Within the CRM you can do this through Forms or HubSpot Marketplace app.
Integrating LiveAdmins through HubSpot Marketplace

Step 1:
Open https://app.hubspot.com/ in your browser and login with your credentials. In the navigation bar at the top, open the Marketing dropdown box, select Forms. Shown as (1) and (2) in Figure 1.

Step 2:
A new page will open by the name of Forms. At the top-right, look for the Create Form button. This is shown as (1) in Figure 2.

Figure 3
Step 3:
From ‘Choose your form type’ page, select Embedded form and click Next at the top-right corner.

Step 4:
Select Blank Template on the new page from the left. After this click on Start at the top-right corner. This is shown as (1) and (2) in Figure 4.

Figure 5
Step 5:
A new page will open, drag and drop the fields you want from left to right. You will see a live preview of the form as you go. There is also an option to create a custom field from the Create New Field section by scrolling down on the left-hand panel.
Once you have added all the fields, click on Update at the top-right of the screen.
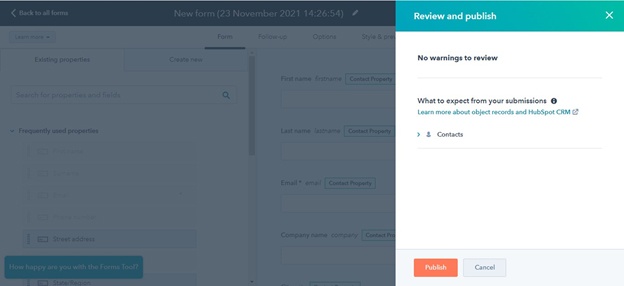
Figure 6
Step 6:
From the Review and publish side popup, select Publish. This is shown in Figure 6.

A pop-up will appear, you need to copy the link shown in Share Link with us via email. This is shown in Figure 7.
Integrating HubSpot through LiveAdmins Dashboard (Backup Method)

Figure 7
Step 1:
Login to the LiveAdmins dashboard at https://dashboard.liveadmins.net/ with your credentials. In the navigation bar on the left-side of the screen, open HubSpot Settings, shown as (1) in Figure 7 at the bottom of the bar. Press the Connect button, shown as (2) in Figure 7.
Step 2:
A new page will open up by the name of Connect account with HubSpot.
This is where your website will be listed. Choose your website from the Name field, and following it, find the Connect button under the Connect to HubSpot field, ensuring it’s in the same row.
Click on Connect and wait for the HubSpot login page to open, login using your HubSpot credentials.

Step 3:
Select your Account name or Portal from the Name field, the one you wish to connect. Shown as (1) in Figure 8.
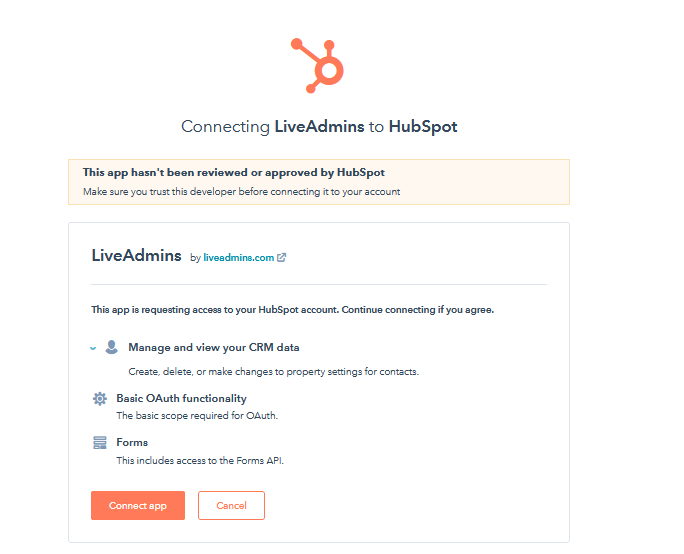
Figure 9.1
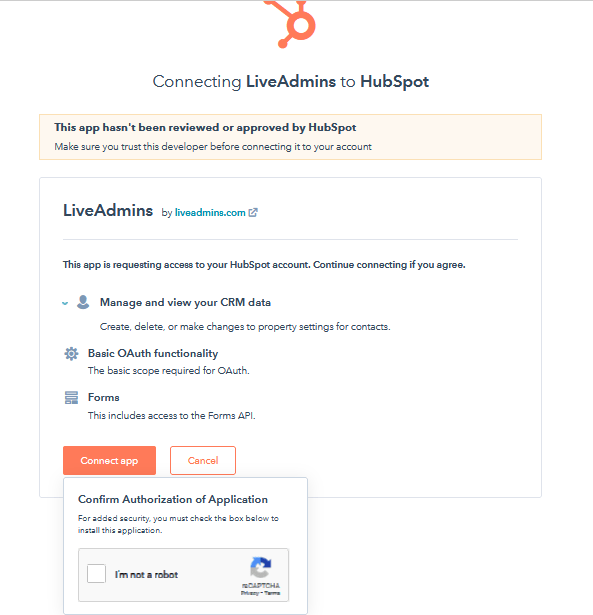
Figure 9.2
Step 4:
A page will appear, requesting for permissions. Click on the Connect App button at the center. As shown in Figure 9.1. Then reCAPTCHA will appear for Authorization confirmation, Check I’m not a robot box. As shown in Figure 9.2
Step 5:
You will be redirected back to the Connect account with HubSpot page on the LiveAdmins dashboard. This means, you have successfully granted permissions for LiveAdmins App to generate contacts into your CRM.

Step 6:
Open https://app.hubspot.com/ in your browser. In the navigation bar, click on the Marketplace button, this is to the right of the search button. Shown as (1) in Figure 10.
In the Marketplace dropdown box, click on Connected apps. Shown as (2) in Figure 10.
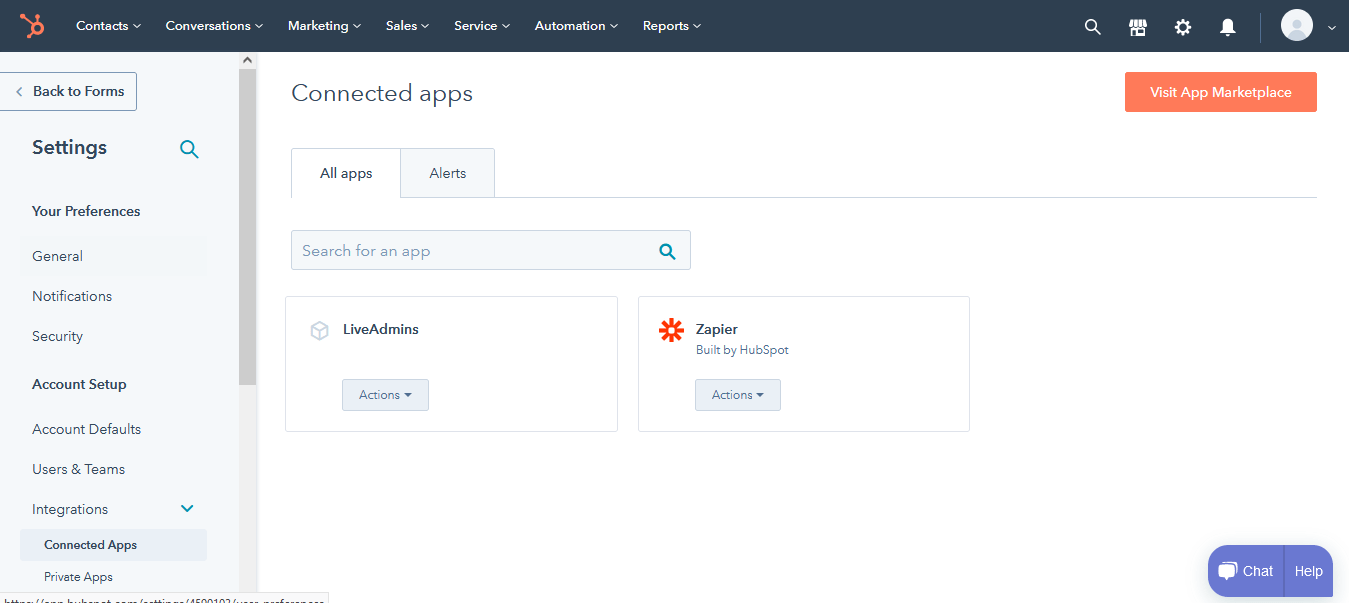
Figure 11
Step 7:
You will see LiveAdmins in Connected apps. This means we are able to push leads to your CRM. Shown in Figure 11.

Ensuring proper integration has occurred:
Click on the Marketing dropdown box, and click on Forms. A new page will open by the name of Forms. A new form will appear with the same name as your domain. Shown as (1) in Figure 12. This has been created by our app in your CRM, it is recommended that you don’t delete this, while you are working with us.
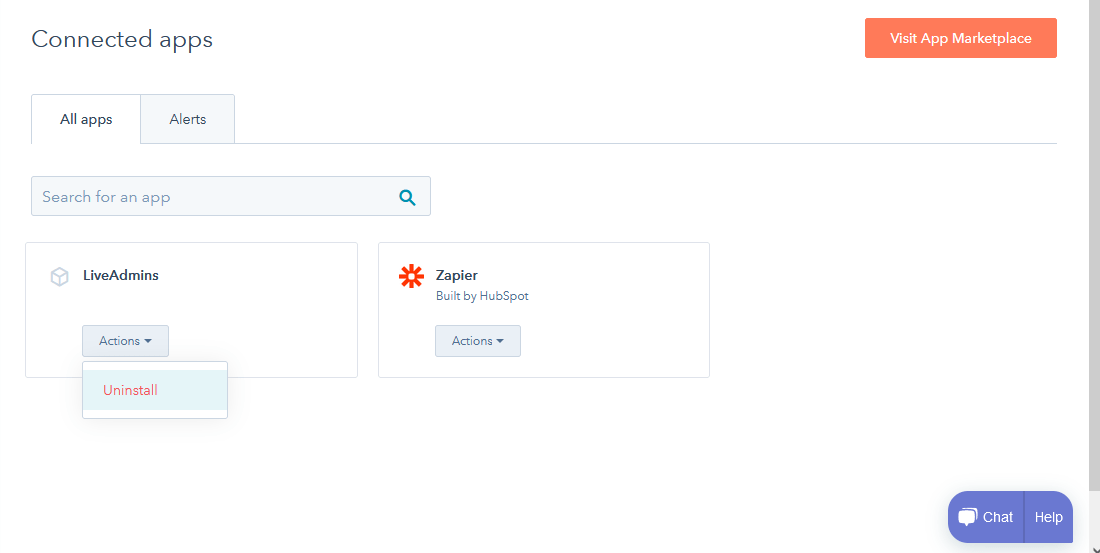
Figure 13
Terminating CRM Access:
If you wish to discontinue using LiveAdmins on HubSpot, you need to navigate to the drop-down box to the right of Connected apps and choose Uninstall. As Shown in Figure 13.

